

In order to create a new group, perform the following actions:
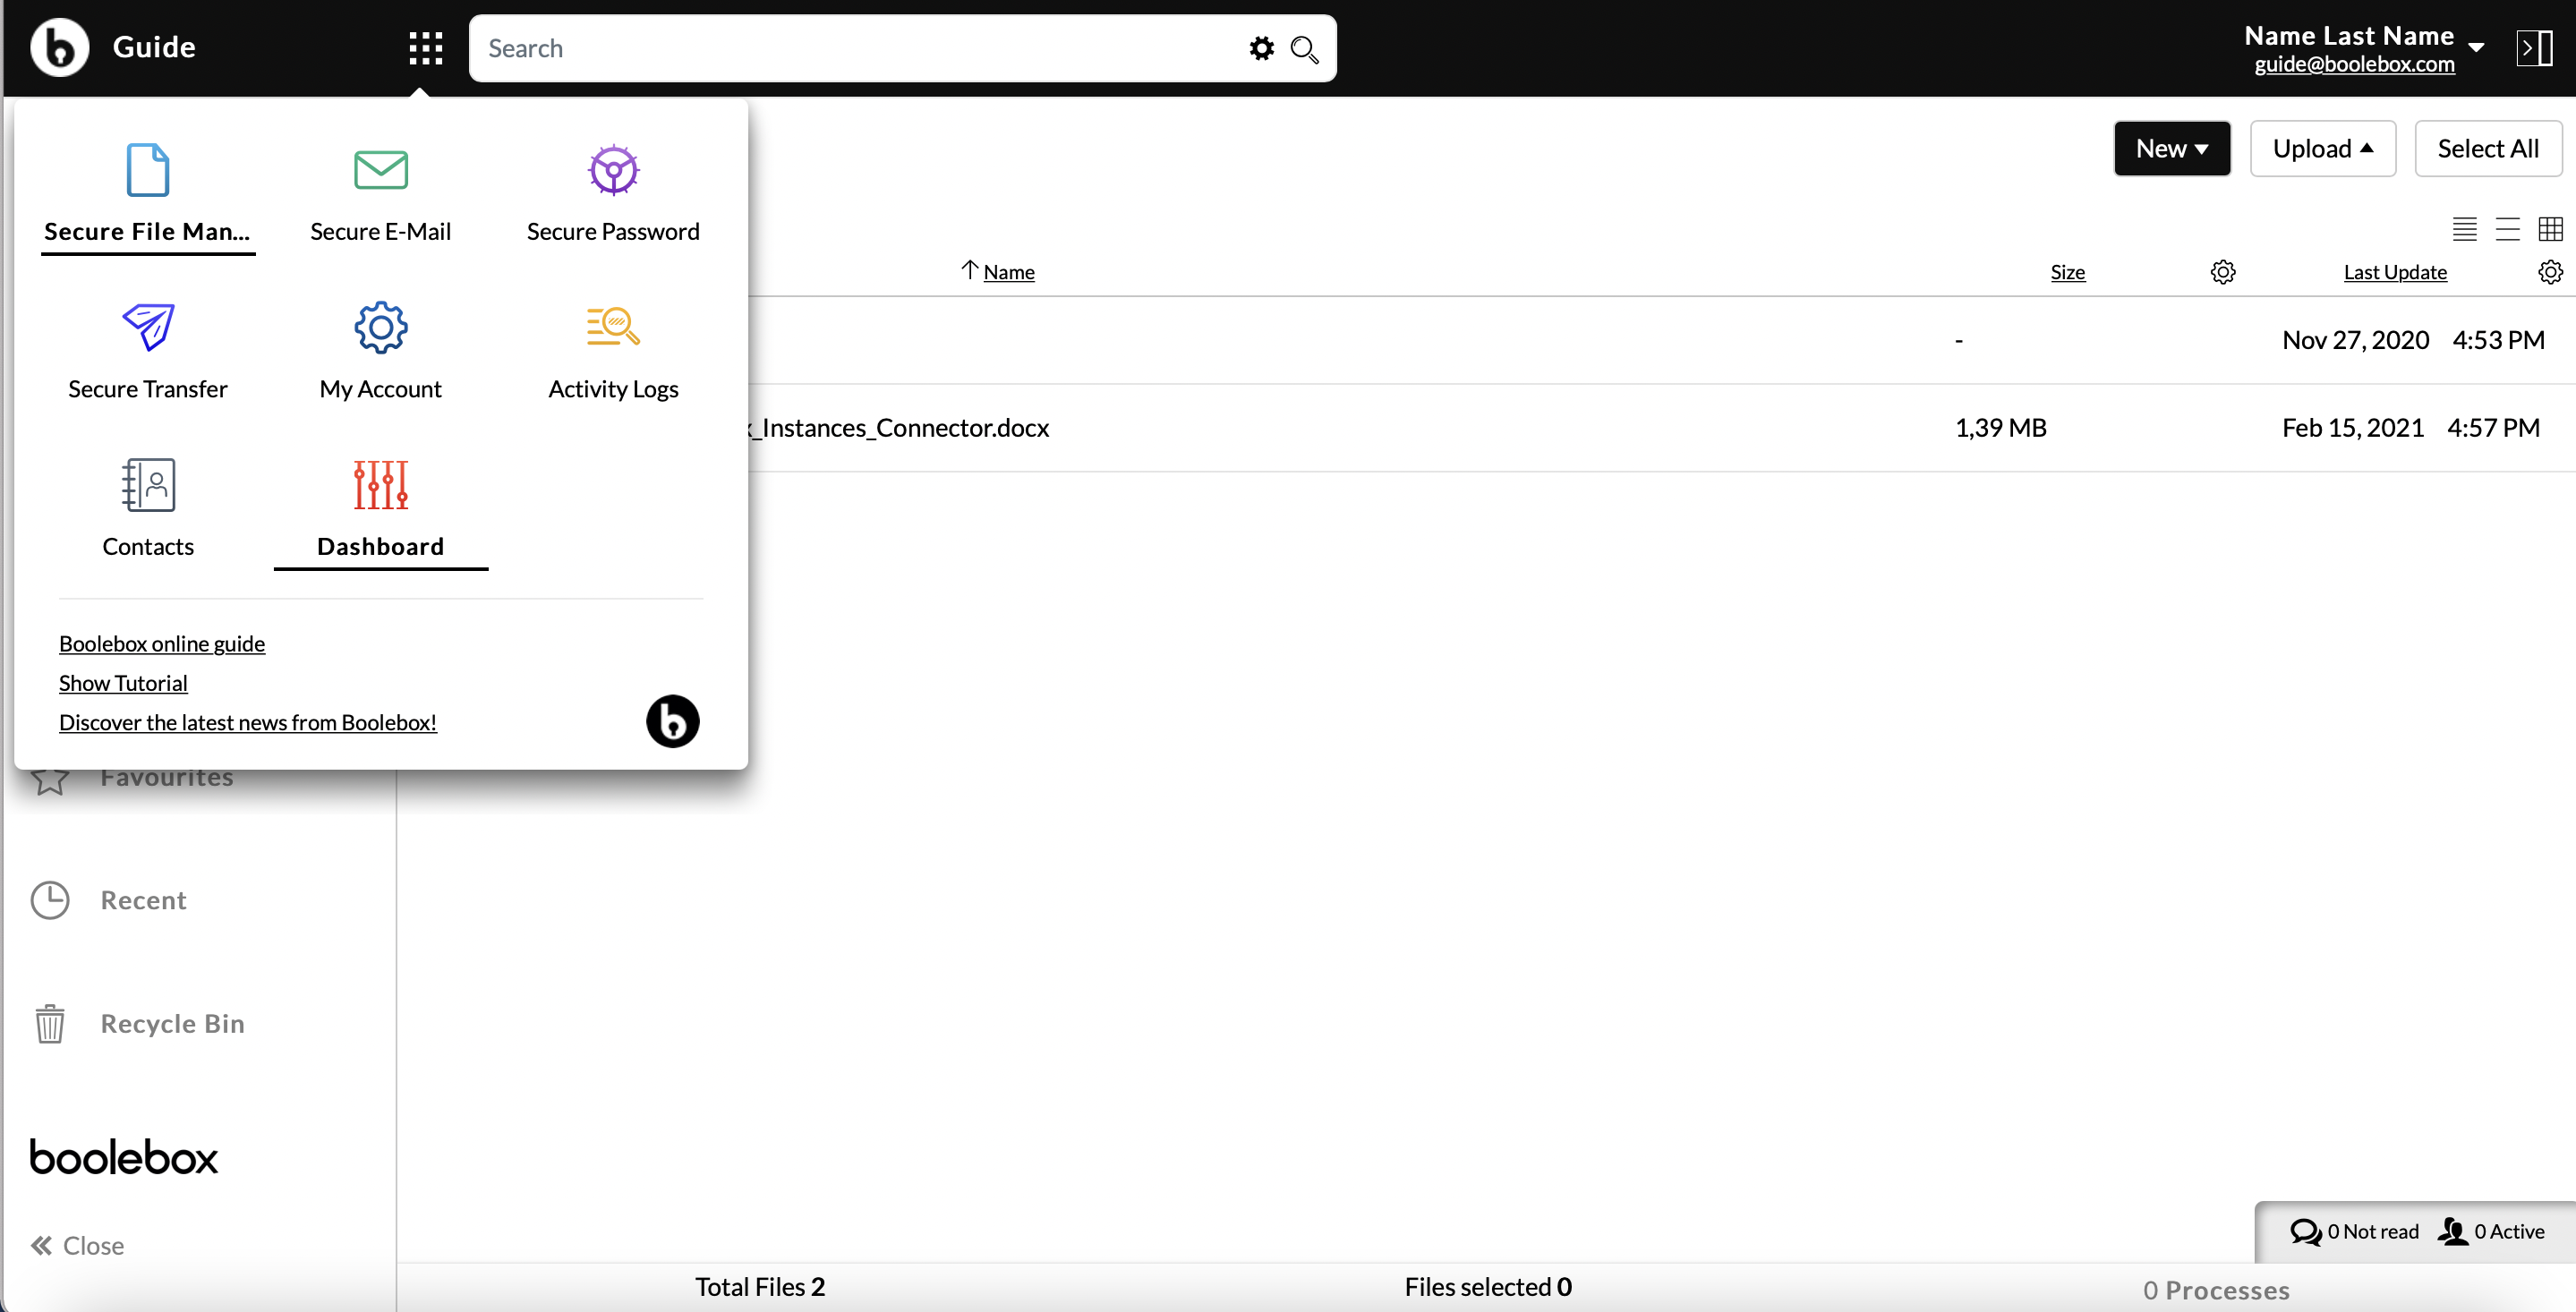
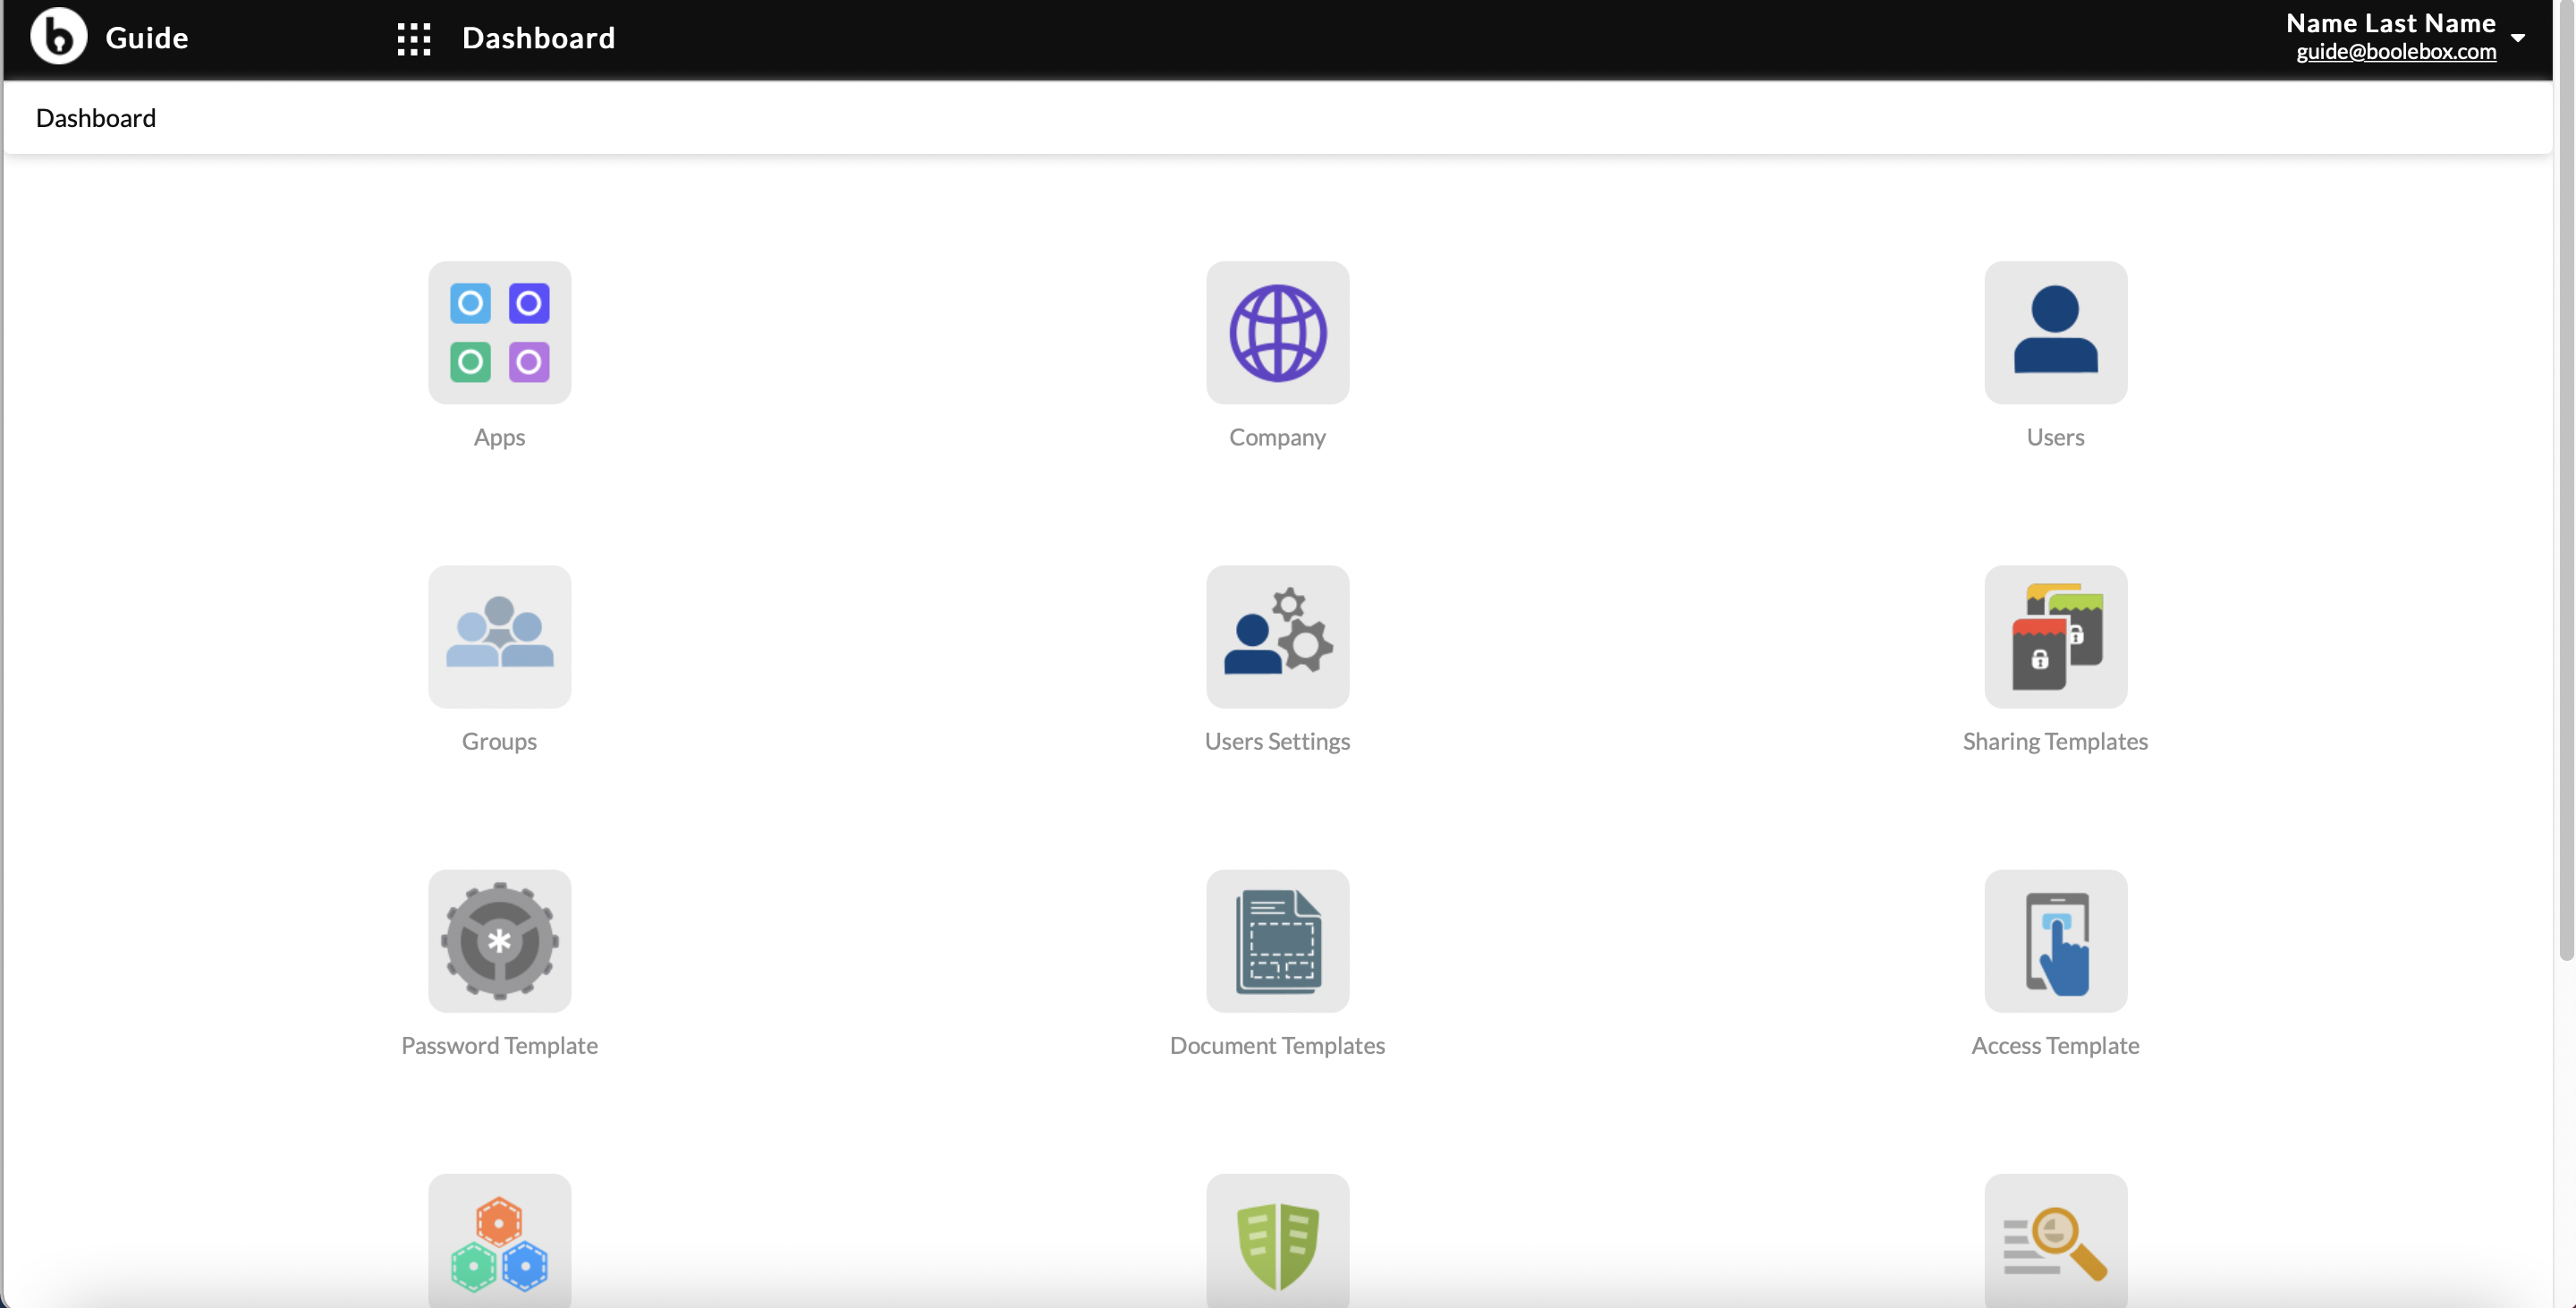
- Click on the menu icon in the top-left corner of your account’s homepage to access your DASHBOARD.
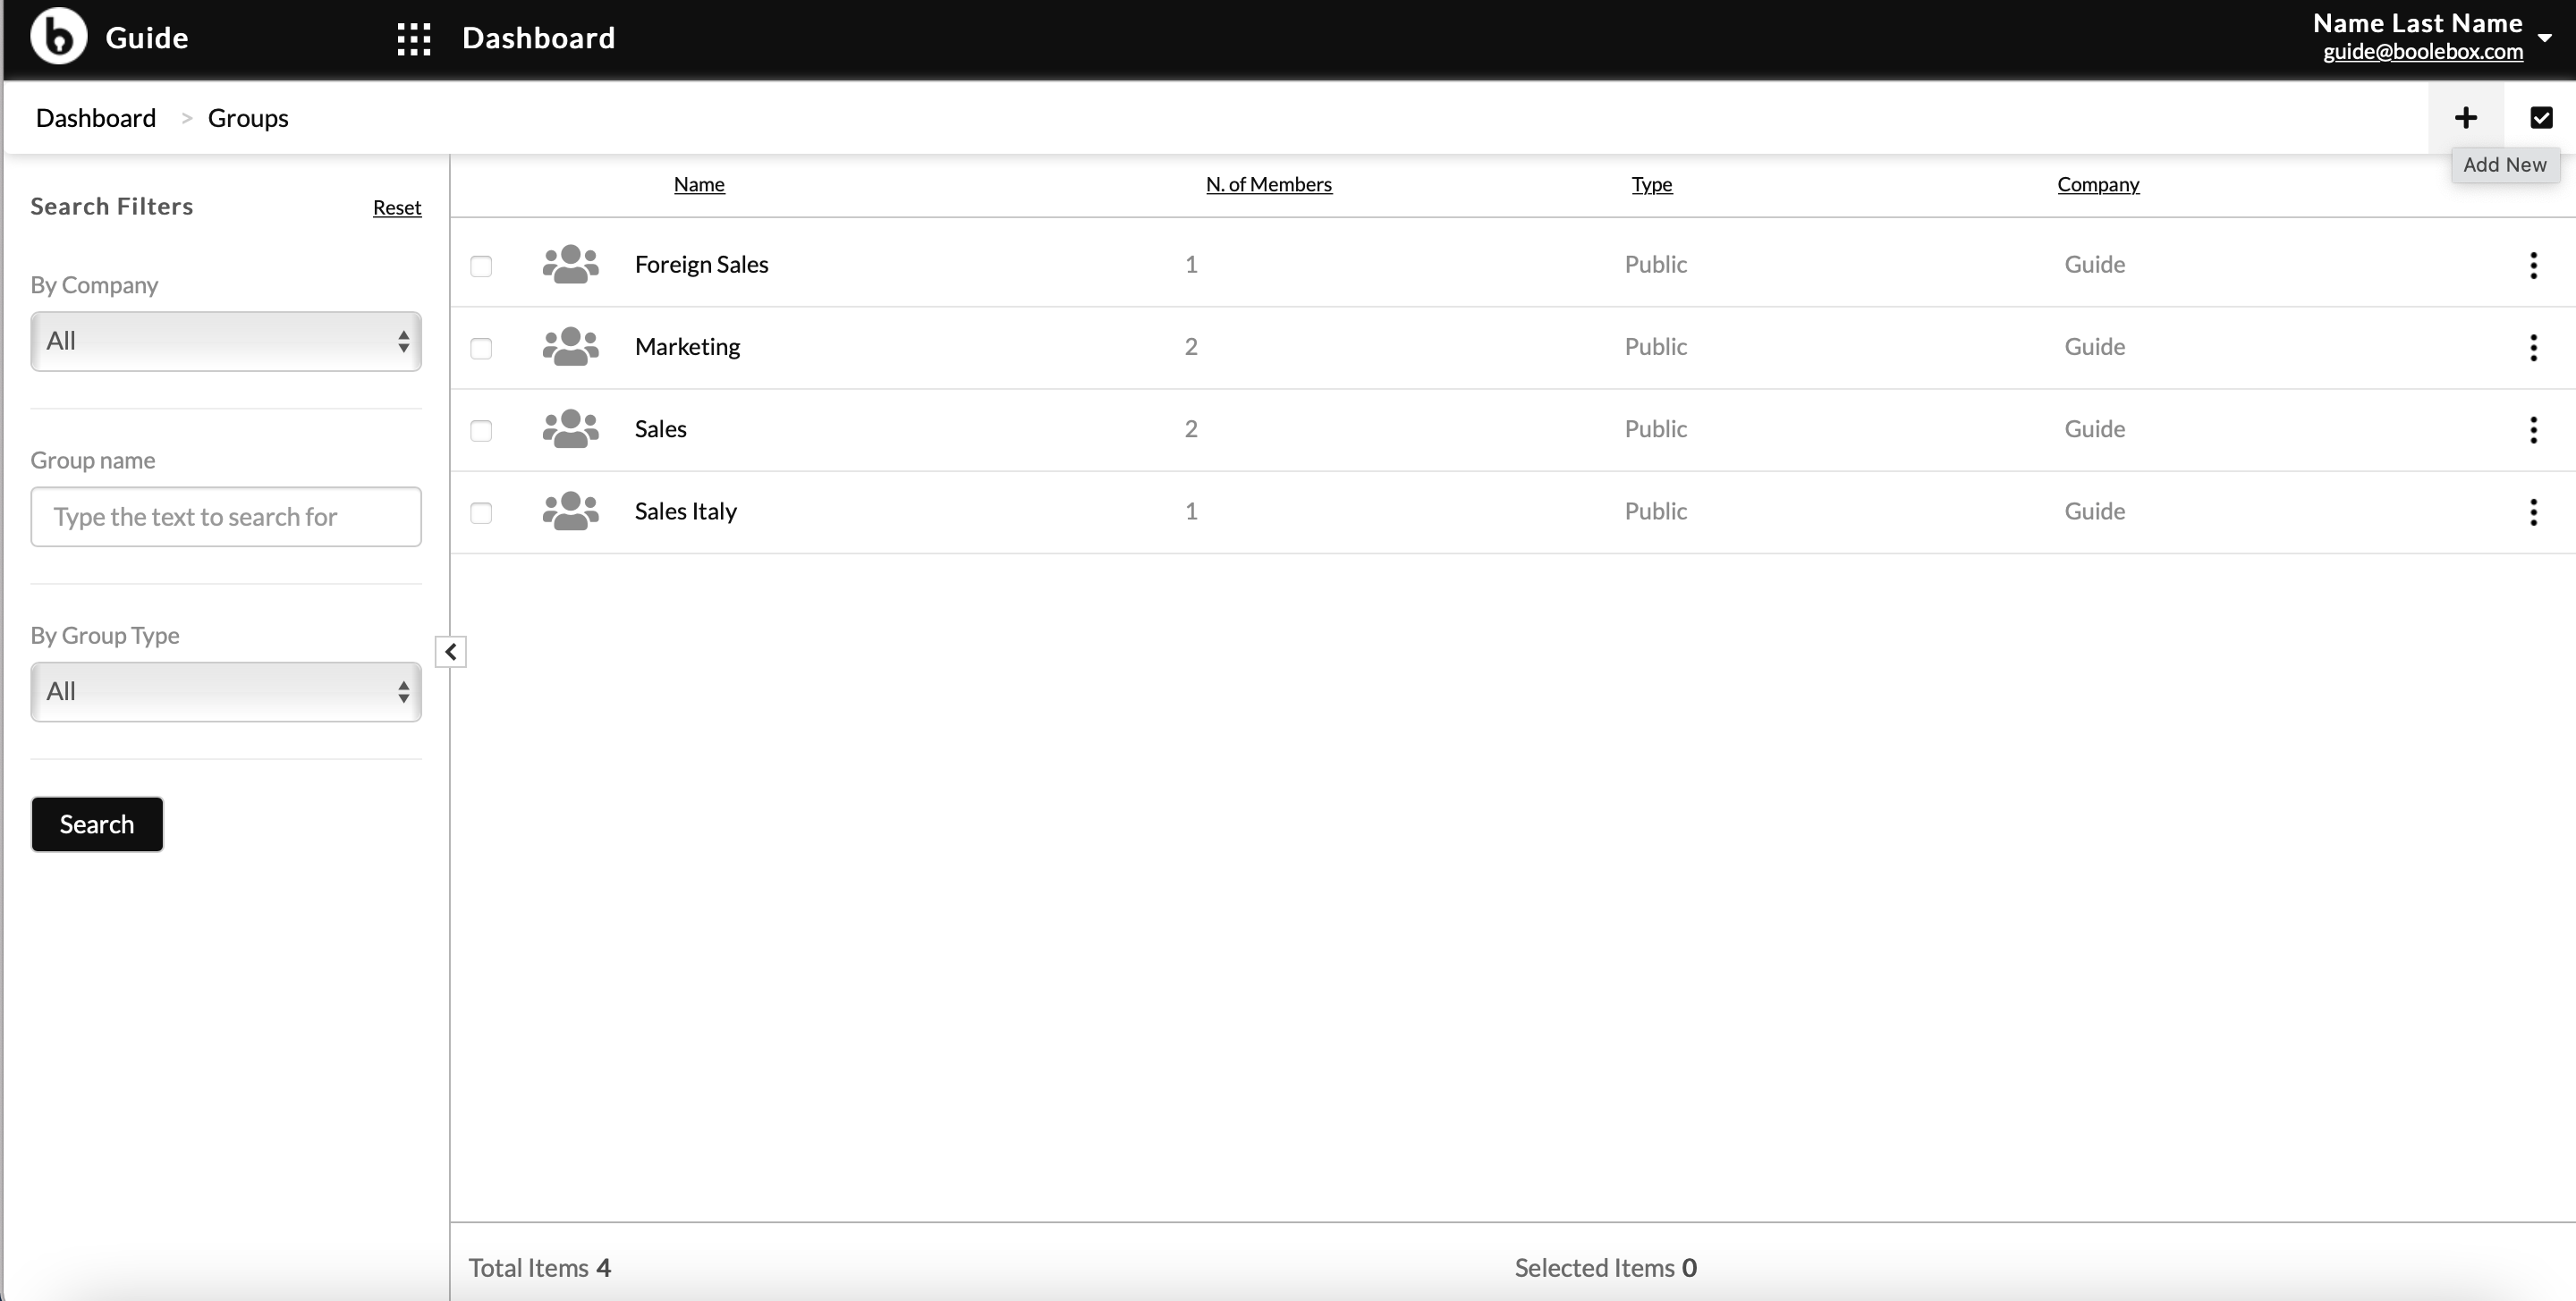
- Access the GROUPS section.
- Click on the + ADD NEW symbol located in the top right.
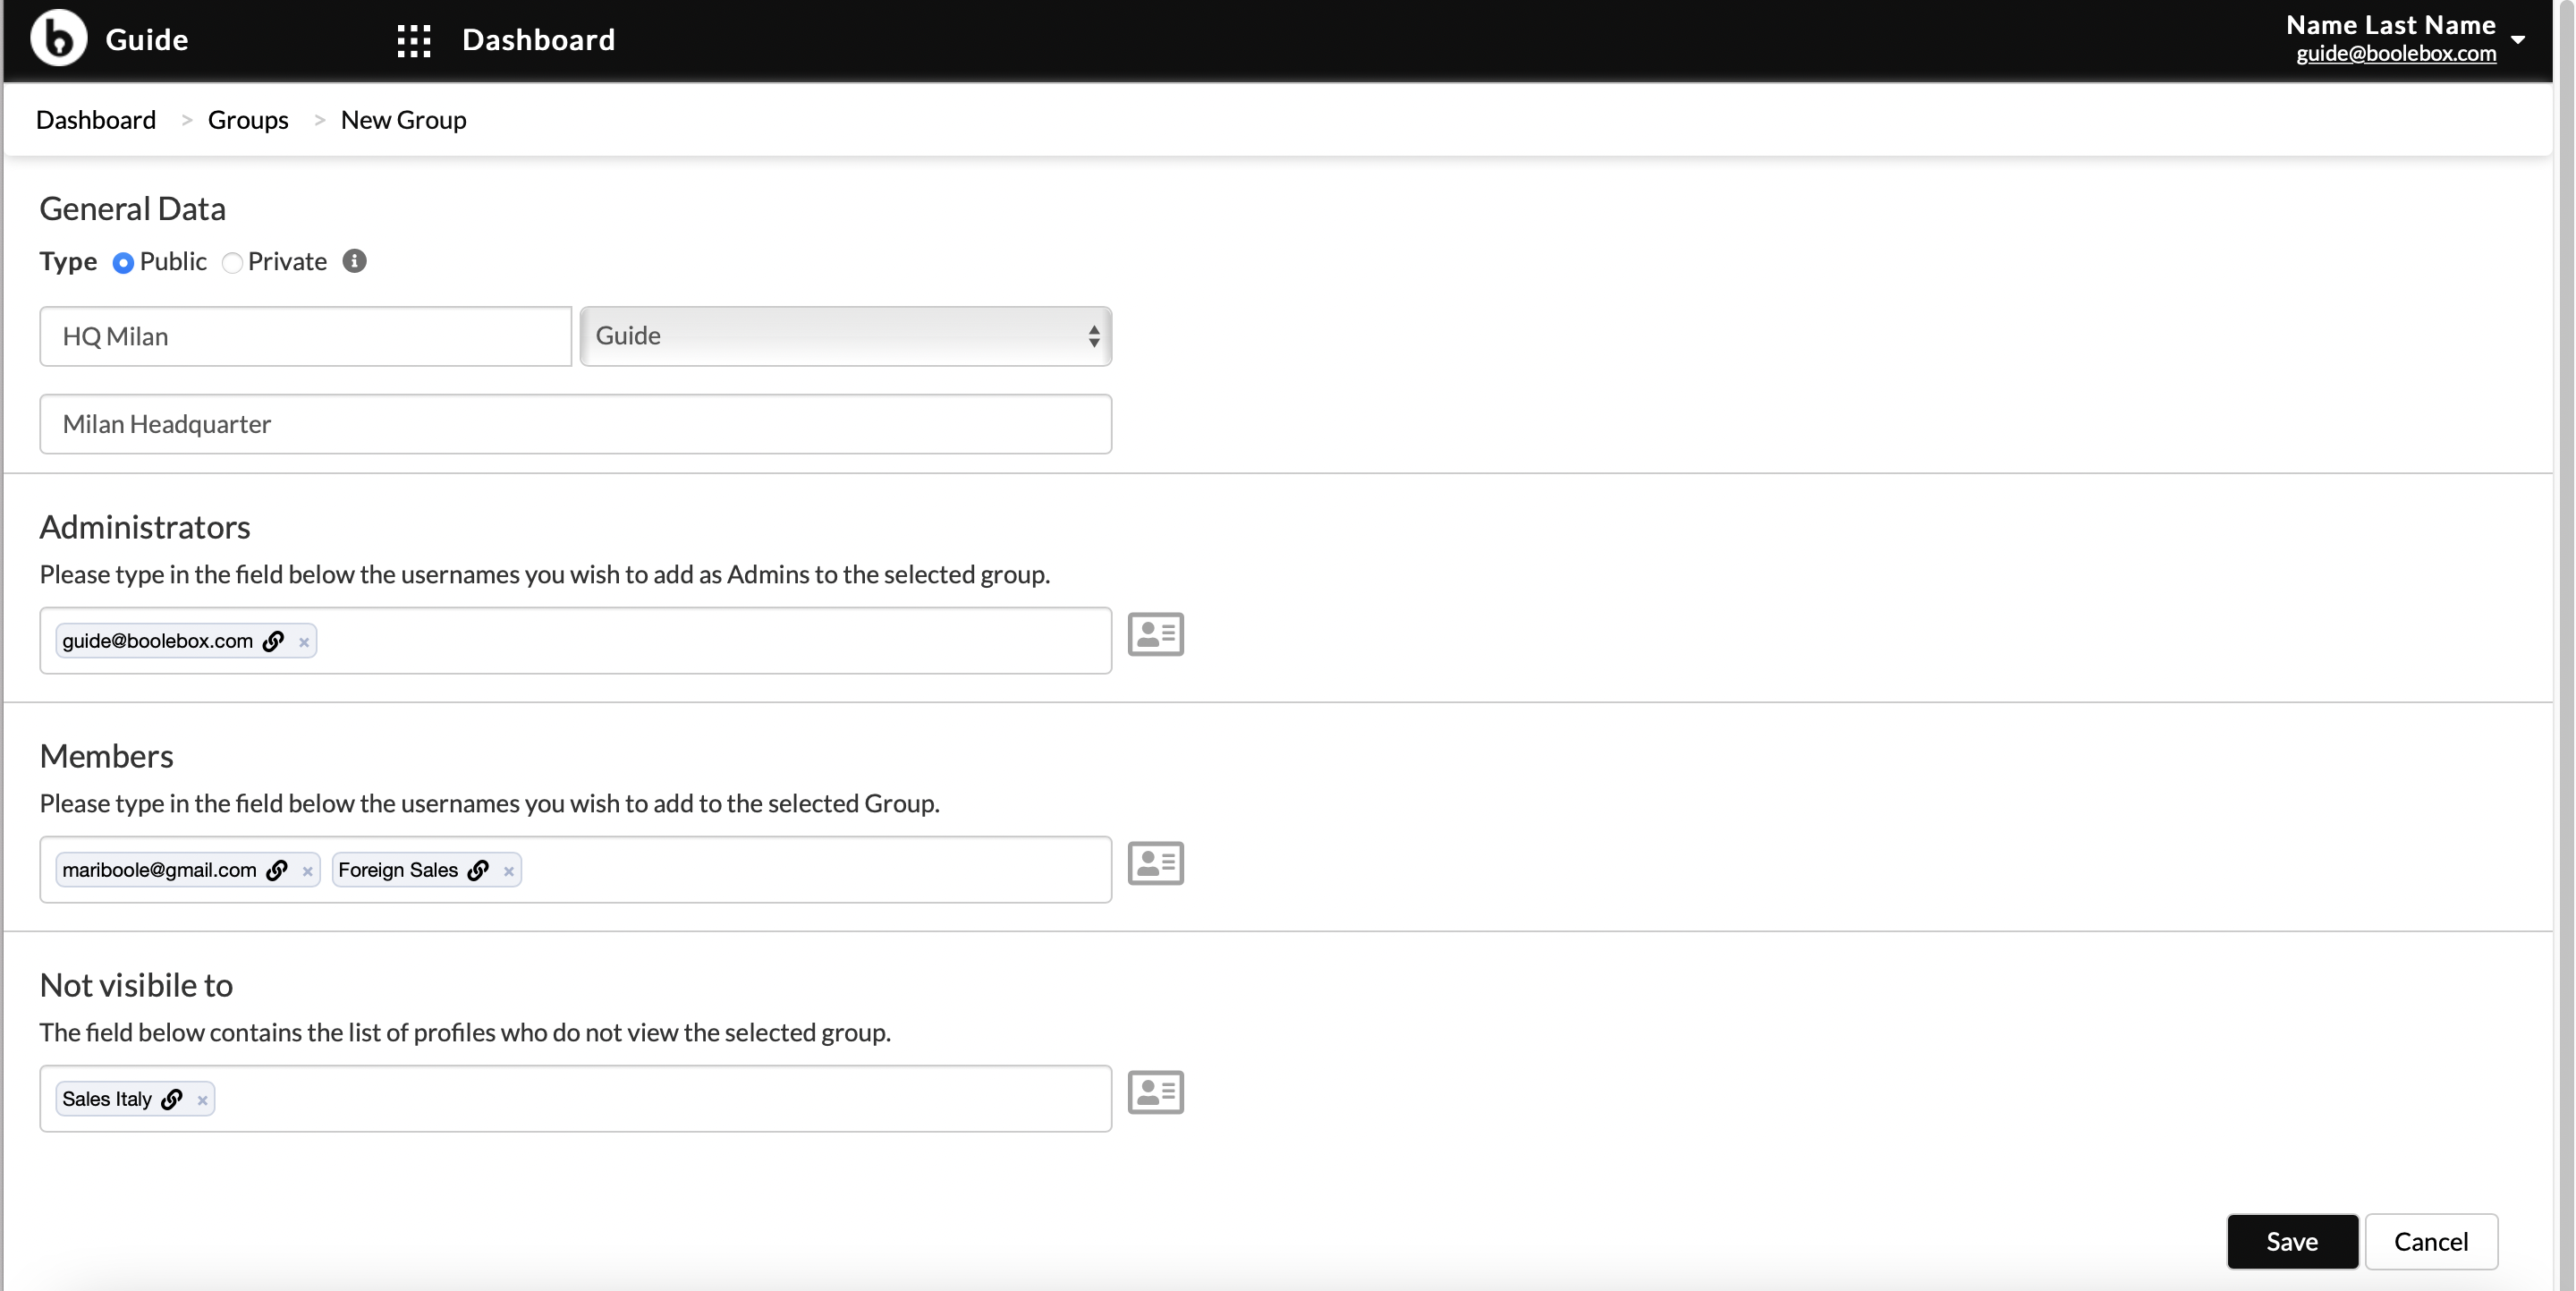
- The GENERAL DATA configuration screen appears.
- Select the TYPE of group you want to create: PUBLIC (visible to other groups) or PRIVATE (visible only to users within the group).
- Enter the name of the group you are creating.
- Select the company to which this group will belong by selecting the item of interest from the drop-down menu.
- In the underlying field a short DESCRIPTION can be entered: it will be useful as reference information on the characteristics of the group being configured.
- Enter the username of the accounts that are to be added to it in the MEMBERS field, separated by a comma. To add all users, type ALL.
- In the VISIBILITY field it is possible to specify exceptions to the type of group being configured:
– if it is a PUBLIC type group, it is possible to list the users or users group you do not want to make it visible to in this field.
– if it is a PRIVATE type group, it is possible to list the users or users group to whom you want to make it visible in this field. - Press SAVE to confirm the changes made.
- The new group will now appear listed in the main area.
Note: the group name must be unique. If you attempt to create a new group with an already existing name, an erorr message will appear, informing that the specified item already exists.